How to connect NAS-box QNAP TS-439 to VMware ESXi 4.1 via iSCSI
This article is the first in a series of articles where I eventually end up with a QNAP TS-439 Pro connected to VMWare ESXi 4.1 via iSCSI.
 meets
meets 
First enable iSCSI on the QNAP
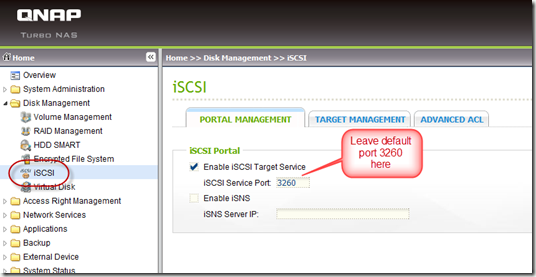
First ensure that your NAS is connected to the network via a switch, preferably a 1Gb switch. Now you can enable an iSCSI target (yup, sounds strange, but an iSCSI target is actually the storage that the iSCSI Initiators will use. The ESXi has built in an iSCSI initiator) on the QNAP, which can studied in detail here.
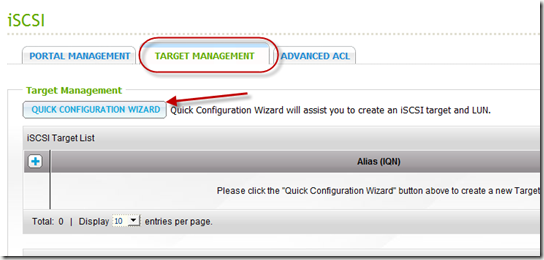
Then click on the TARGET MANAGEMENT tab …
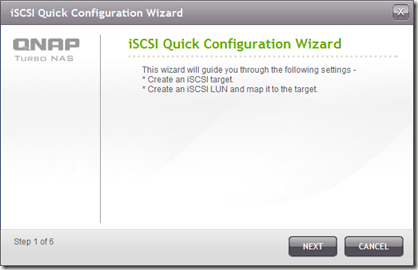
…followed by a click on the QUICK CONFIGURATION WIZARD … In the dialog box that follows …
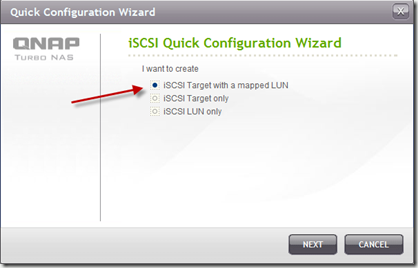
…select iSCSI Target with a mapped LUN… and click the NEXT-button.
Click NEXT again …
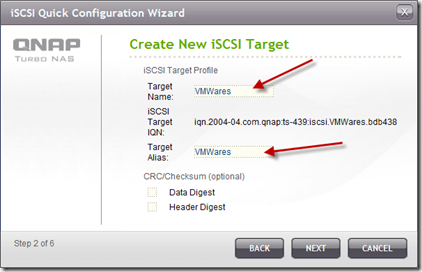
Fill in the Target Name. As you do this, note how the iSCSI Target IQN automatically fills in. The IQN is the real and unique name below the scenes that ESXi will use. But since it is hard to remember such names, you can also fill in a Target Alias. This makes it much easier later on. Click NEXT …
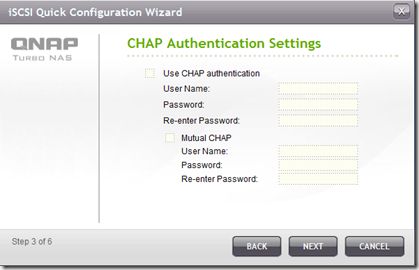
If you want to have username- and password security on the iSCSI Target, then fill ut this form. I have not tried this one! Click NEXT …
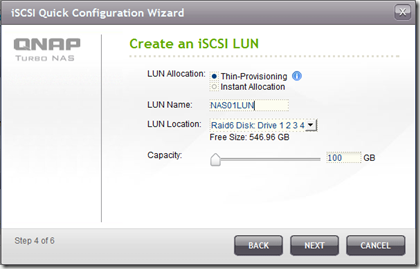
Fill in a LUN Name and select how large the LUN should be. This can be changed later on, so just give it an initial size. Also note that I selected to use Thin Provissioning. This means that the 100 GB in the example above won’t be allocated right away, but expanded as needed. Note that this may very well has a severe impact on iSCSI-performance, as the QNAP also has to expand the LUN as needed. Click NEXT …
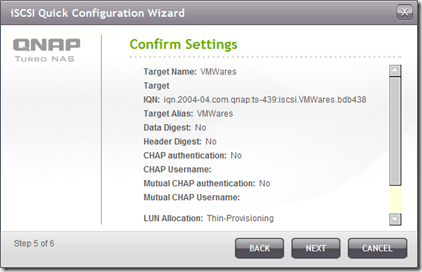
Time to confirm your settings. If OK, click NEXT the last time.
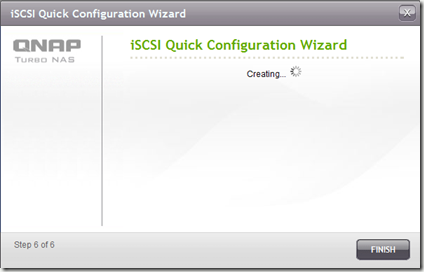
If everything goes well, you should see this;
How to connect your ESXi to your NAS via iSCSI on a dedicated LAN port.
You should end up with a iSCSI-target, visible in the screen below;
Then enable iSCSI on ESXi 4.1
In the vSphere Client, navigate to the Configuration tab (1), then to the Storage Adapters (2) and finally scroll down to the iSCSI Software Adapter (3)… Behind the scenes, this is the actual iSCSI-initiator described in the beginning…
Click on the Properties link on the right side …
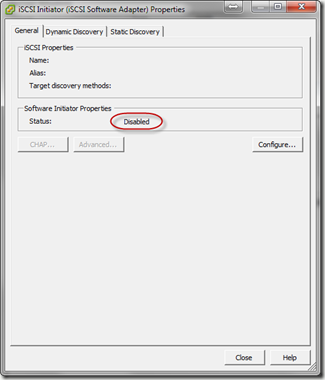
As you see, the iSCSI adapter isn’t enabled yet;
Click on the Configura-button, …
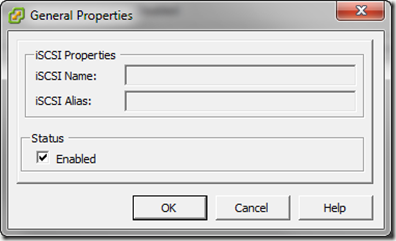
And in select the Enabled check box. Click OK … This makes ESXi 4.1 fire up the iSCSI initiator … 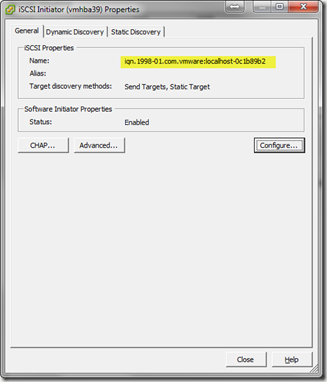
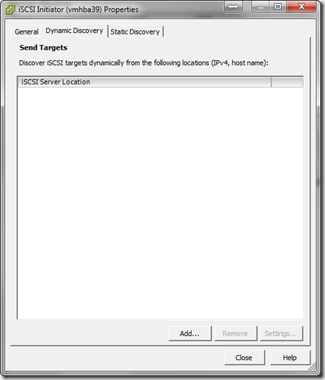
Note how ESXi also add some unique naming to the initiator… Now, you can either select a dynamic or static discovery. I have just tried the Dynamic discovery …
Click the Add-button …
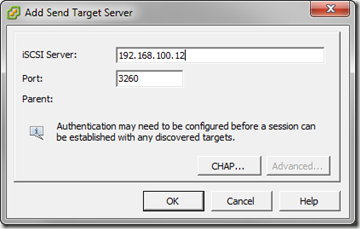
… and specify the IP address of your NAS box. You could probably use a DNS-name here too, if you have a DNS service in your network (or even a hosts-file entry would suffice …). I like IP addresses … Also, note the CHAP-button, to specify the username- and password security if you choose to use that on the NAS-side. Before you proceed, make a quick bookmark in your brain on this dialog box. This is where you later will change the IP address to allow the NAS and ESXi server to communicate on a dedicated LAN port …. Click OK…
You should now see your last registration in the Send Targets-list … Click Close when finished ….
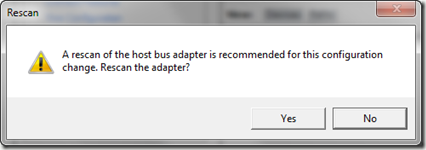
ESXi will now ask you whether to rescan the adaper or not …
Of course you want ESXi to rescan the adapter!! Click Yes….
This brings you back to the Storage Adapters-list. In order to see whether the iSCSI connection is OK, you need to res-elect the iSCSI Software Adapter line. Otherwise you will typically see an empty list!!
This means that you can head over to another panel in the vSphere Client, to the Storage …
Add a datastore to the iSCSI-target
Now that we have connected ESXi to the QNAP iSCSI-target, we are ready to create a datastore in ESXi. A datastore is in essence a definition of a place where you store your virtual machines. You can thus have many datastores, such as on the local harddisks and over the network via iSCSI and NFS (Network File Storage) protocols.
Choose the Storage panel;
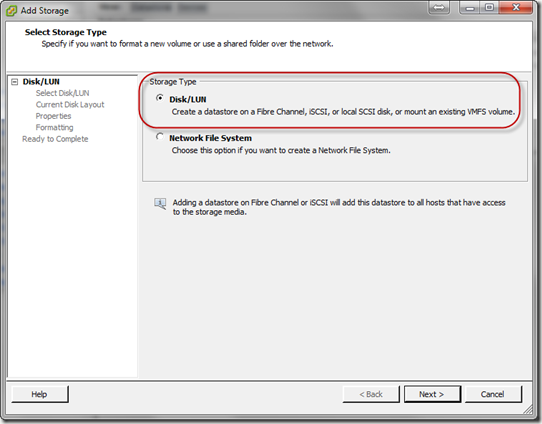
Click on the Add storage-link … which brings up the dialog box below;
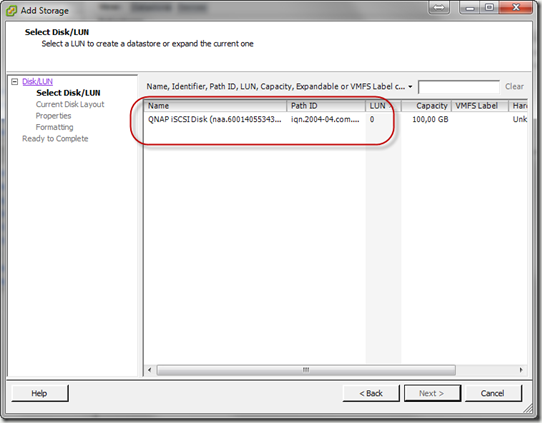
Select the Disk/LUN and click Next …
You should see your QNAP-LUN in the list … Select it and click Next…
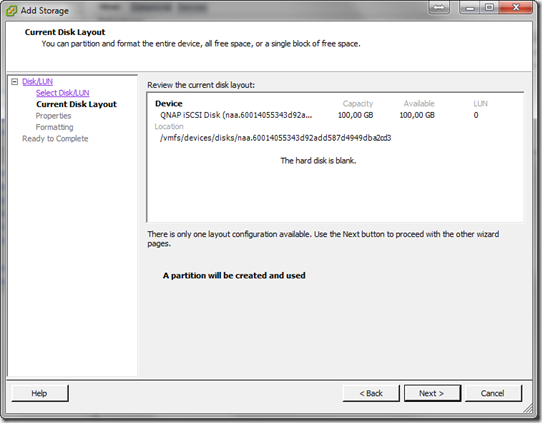
You should see some details about the LUN and some info about “The hard disk is blank” indicating that this is the first time you access the datastore. ESXi needs to prepare it (that’s what A partition will be created and used means…). Click Next …
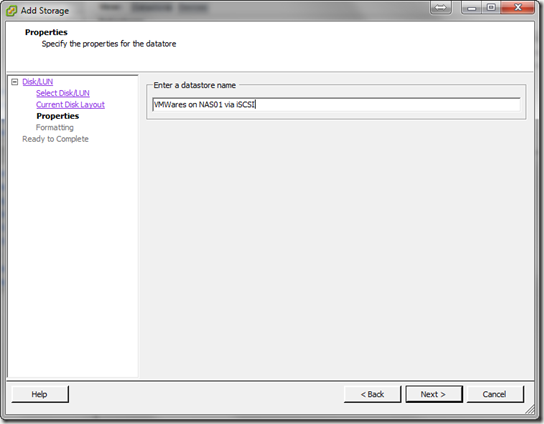
Give the datastore a name and click Next….
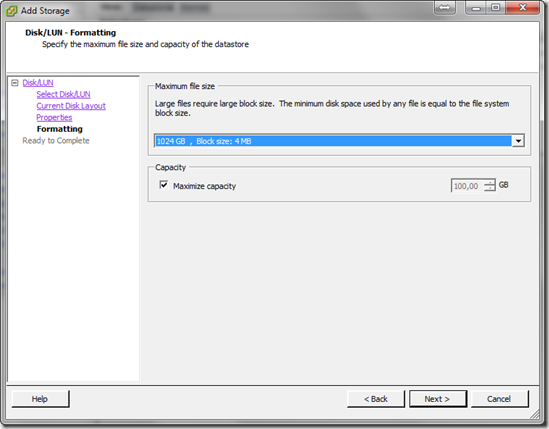
Choose a Maximum File Size. This can be important if you have large files such as databases or media. Click Next….
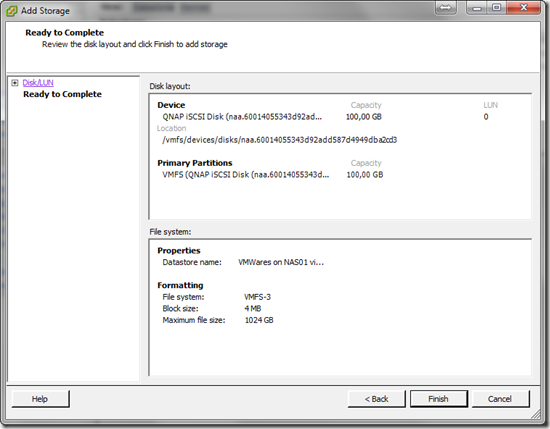
And finally confirm your datastore-creation! Click Finish…
You should now see the datastore in the list of datastores;
Voila, you are now ready to place your virtual machines in your newly created datastore on the NAS!
…but be prepared … you will probably not be too impressed about the performance of your virtual machines. Keep in mind that you can speed things up a bit, by having fast drives, using simple RAID 1 instead of RAID 6 and of course, using a dedicated 1 GB LAN port just for your iSCSI traffic. This will be covered in a later article.
By the way – you can also check who is using your iSCSI-target in QNAP
Open up the iSCSI Target Management panel in QNAP, and note the icons has changed a bit. You cannot longer delete an iSCSI-target if it is in use. If you click on the button at the arrow below…
…you will see a list of iSCSI initiators using this iSCSI target;







Comments
works like a charm
less then a minute working
greetings
Eric
Posted by eRIC At 09:04:34 On 25.12.2012 | - Website - |
Thanks you very much, very appreciated
Posted by Luciano At 22:29:40 On 04.01.2014 | - Website - |
why do I continue getting the error message "404 not found, the server couldn't interpret the client's request" when trying to connect to my QNAP via vSphere Client? Thank you
Posted by Franco At 00:43:01 On 21.01.2014 | - Website - |